Okedo Construction, part 2
[If you’re looking for part one, go backward here.]
PAGE MENU
STEP 4: LACE THE TENSIONING STRING
STEP 5: STRETCH THE HIDE
STEP 6: MARK ROPE HOLES
STEP 7: STITCH THE HIDE
STEP 8: TRIM THE HIDE
STEP 9: CUT ROPE HOLES
STEP 4: Lace the Tensioning String
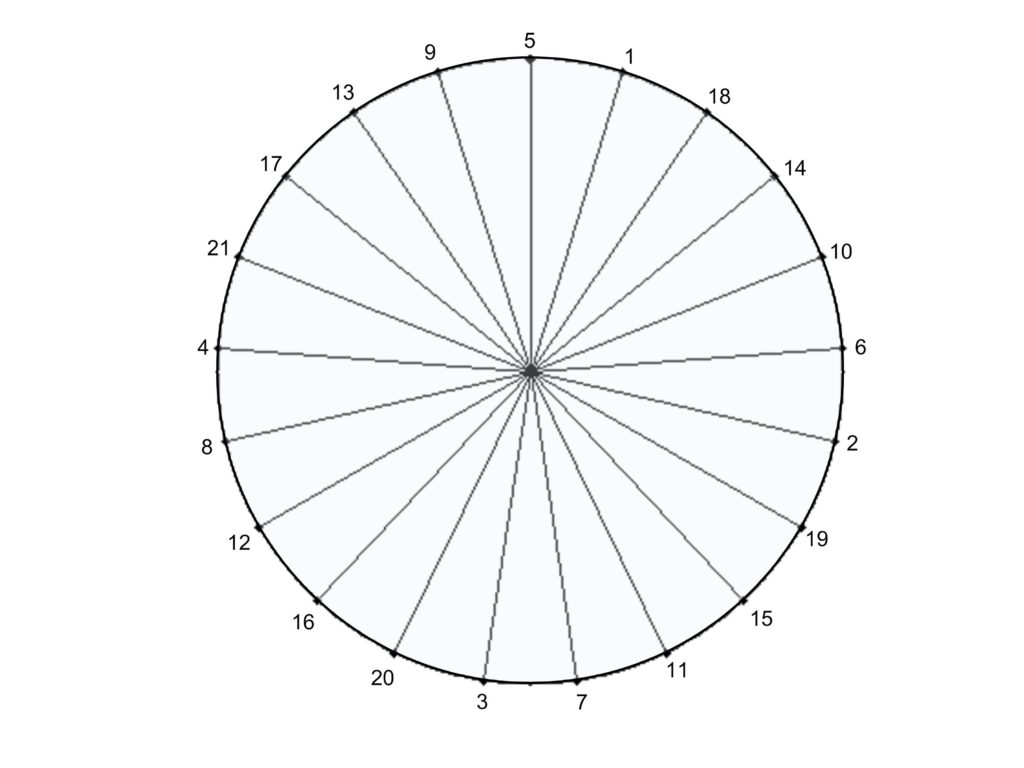
Now it’s time to thread the string through the holes. Before tightening the strings it is a good idea to lubricate the ring so the head will slide over the hide as it is tensioned. This step isn’t usually necessary for okedo, but if the hides are thick and you desire a good stretch it will be very helpful.
The string is threaded in from the opposite side that the ring is resting on. Make sure that the ring is resting on the inside of the hide (i.e. the rough side) and the smooth side is opposite the ring. This order will insure that the proper playing surface faces out when the head is complete.
When the string is threaded through all the holes tie a BIGknot in the end to prevent it from passing through the hole where the pattern started. The final end stays loose and is clamped with the spring clamp as the hide is tightened around the ring.
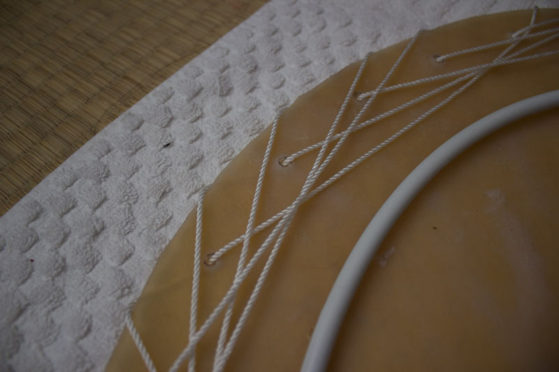
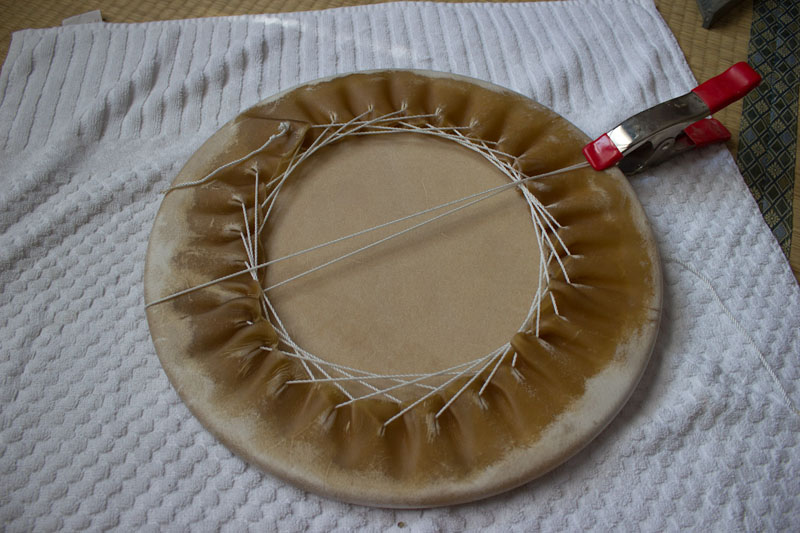
A close-up of a completed 29 hole pattern is shown below, before it has been tightened. The holes have been marked with chalk using the template and punched approximately 3/4″ in from the edge of the head with the leather punch.
VIDEO: LACING THE STRING
STEP 5: Stretch the Hide
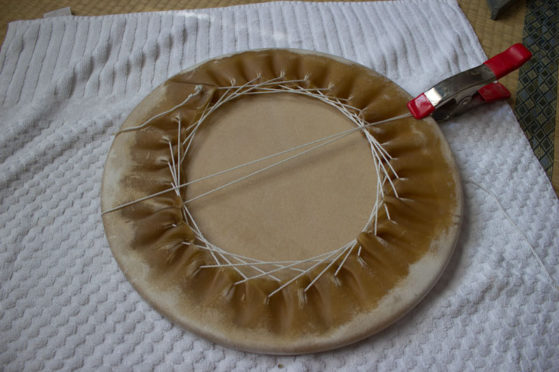
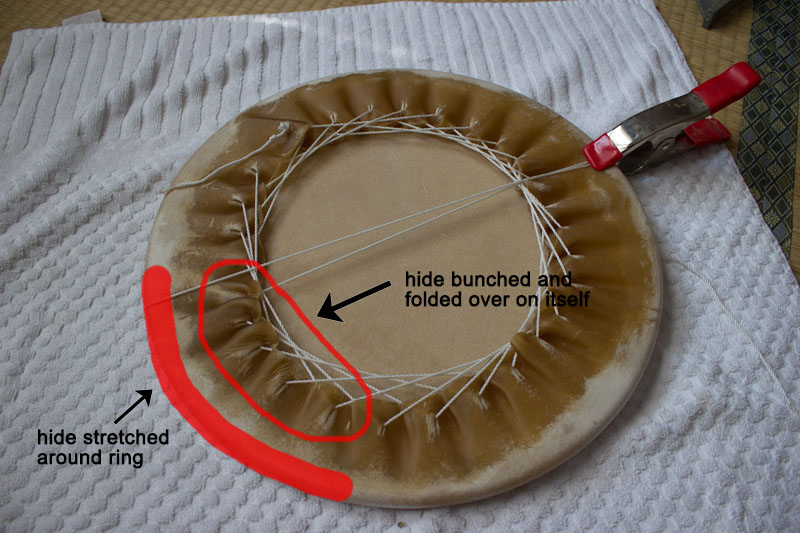
It’s time to tighten the strings to stretch the hide around the ring. Work around the perimeter starting at the first chord, taking the slack out of the strings. Each pass will pull the head more snugly around the ring until the excess hide is completely folded over against the back side of the playing surface. Make sure the head stays centered during this process.
VIDEO: TIGHTENING THE STRING
Once the head is snug around the ring it can be stretched by pressing on the playing surface and re-tightening the string. This can be done a number of ways – using the heel of your hands, or getting someone to stand on the head. Note that in the picture below the hide is turning white around the perimeter indicating a good stretch has been achieved. The stretch is important for thick hides like cowhide but should be done cautiously for thin hides such as calfskin of horse hides due to the possibility of tearing.
VIDEO: STRETCHING THE HIDE
STEP 6: Mark Rope Holes
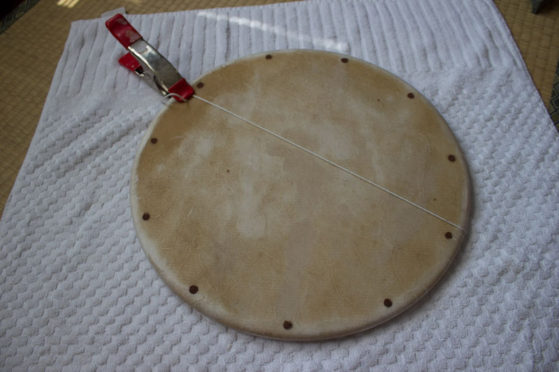
After the stretching is complete and there is no more slack in the strings, the holes for the ropes can be marked with the chalk using the appropriate template. Keep in mind that the holes need to be marked along the edge of the ring and that they need to be large enough to accept the rope.
STEP 7: Stitch the Hide
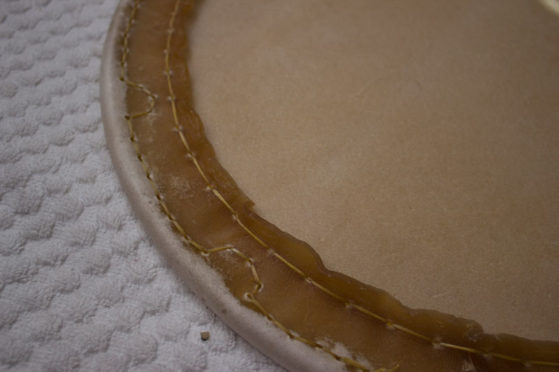
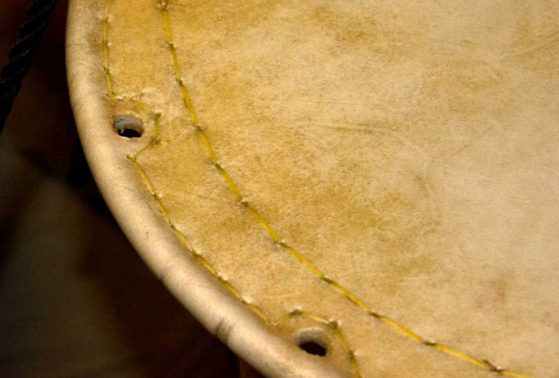
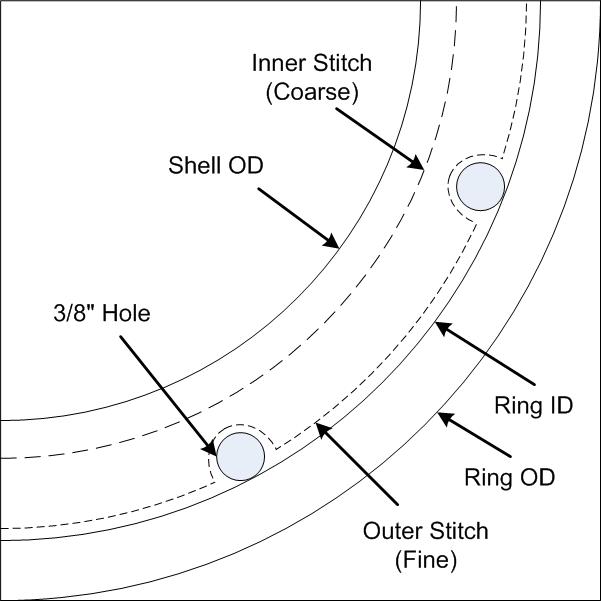
There are two lines of stitching required for an okedo head. The Outer Stitch is the stitch that runs along the ring. This is the important stitch. The Outer Stitch isn’t a continuous line, it deviates around the rope holes that were marked in the last step. The inner stitch is continuous and does nothing more than hold the two sides of the hide together in the space between the ring and the shell.
- The Outer Stitch should have at least twice the stitch density as the Inner Stitch.
- The Outer Stitch should be right up against the ring.
- The Inner Stitch should be very close to the shell, with enough space for the trimmed hide to be bent up and out of the way of the shell.
The stitching is done with synthetic sinew and either a larger leather needle and awl or a leather stitching tool. If you are using a plain needle, measure about 150% of the circumference of the head worth of synthetic sinew. Tie a knot in the end of the sinew, leaving enough extra length to tie it to the other end after the stitch is completed. Use the awl to punch the holes in the leather and perform a simple straight stitch around the circumference. Periodically tighten the stitches. Do not tie the end of the sinew to the needle. Once complete, tie off the two ends of the sinew and trim the excess.
If you have a leather stitching tool like the Speedy Stitcher Sewing Awl, it will make your work much faster. Read the directions for the sewing awl and then straight stitch around the circumference of the head. Keep in mind that when using the sewing awl it isn’t necessary to make it all the way around the head in one go, you can do it in segments and simply overlap the stitches. It is a good idea to back stitch before tying off.
VIDEO: STITCHING THE HIDE, PART 1
VIDEO: STITCHING THE HIDE, PART 2
STEP 8: Trim the Hide
Trim the extra skin on the bottom away so that it doesn’t vibrate against the shell. A large X-Acto knife works well for this. Keep the shaft of the X-Acto in contact with the ring, being careful never to let the knife edge get anywhere near the head. The last thing you need is to put a hole in the head at this point.
Fold the inner edges of the leftover hide up and place the shell where it will eventually go. You can put some cardboard shims in to keep the hide away from the drum body to prevent any contact. As the hide dries it will pull away from the shell and the cardboard shims will fall right out.
STEP 9: Cut Rope Holes
The best tool to use for hole cutting is an X-Acto knife. In the video below we used a sharpened pipe instead of a knife, but it dulled too easily so we recommend a knife. Be careful not to get to close to the stitching. The holes are much easier to cut while the hides are wet, so test that the rope fits through the hole after they are cut. The holes will get a little larger as the hide dries. It’s helpful to put a short dowel in the hole to keep it round as it dries.
If you prefer to not cut the holes while the hide is wet, you can let the hide dry and then cut the holes later on a drill press with a forstner bit.
